Sims 4 Studio Menus
A reference by Amethyst Lilac
This guide will go over the various menus and buttons at the top of Sims 4 Studio, possibly the most commonly used tool in Sims 4 modding and custom content creation.

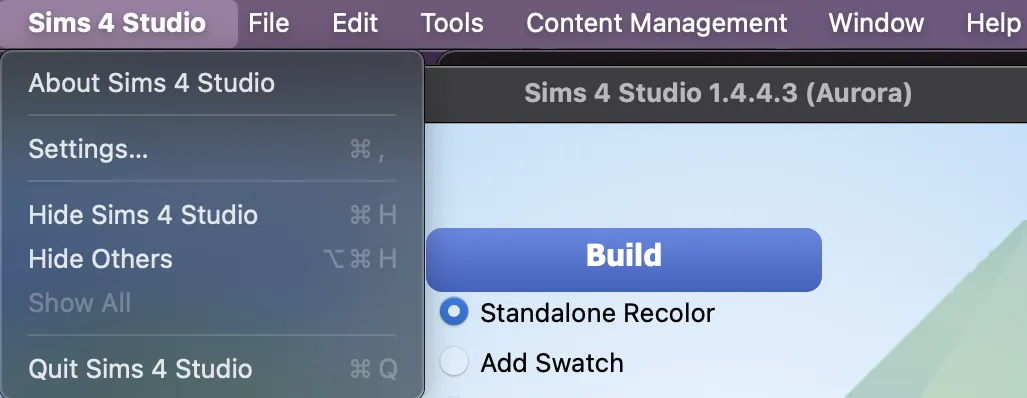
Note: Macs have one set of menus at the top instead of two, and have the standard Mac app menu at the beginning and Window menu to the right, as seen below.
The title bar
Section titled “The title bar”Hide
Not available on Mac.
On the left end of the title bar is a house icon. If you click it at any point, it will take you back to the main page of Sims 4 Studio. It will exit any package you’re editing without saving anything that isn’t already saved. Note that some things auto save and some don’t, so make sure to back up your files because exiting without saving doesn’t always reverse accidental or mistaken changes.
Next to the house is a paint palette. This is a drop-down menu that lets you pick a theme for Sims 4 Studio. There are many colour options, and you can pick light or dark mode, or classic for the original Sims 4 Studio theme.
The menu bar
Section titled “The menu bar”Hide
The File menu has four options:
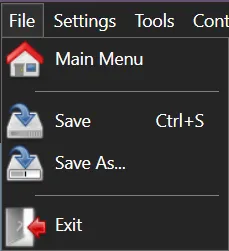
- Main Menu: This will take you back to the main page of Sims 4 Studio. It will exit any package you’re editing without saving anything that isn’t already saved. Note that some things auto save and some don’t, so make sure to back up your files because exiting without saving doesn’t always reverse accidental or mistaken changes.
- Save: This will save your currently open package file. It also shows the keyboard shortcut for Save, which is Ctrl + S. If you don’t have a currently open package, this option will be greyed out.
- Save As…: This will save your currently open package file as a new file, and then will have that new file open. This will not re-instance your file, meaning that it will conflict with the original file. This can be used as a method of creating a new version of your file to test things in without changing the original, but it cannot be used to create a new file that will co-exist with the original, such as a recolour. Use the buttons below to create files for that. If you don’t have a currently open package, this option will be greyed out.
- Exit: This will exit S4S immediately and without saving.
Settings
Section titled “Settings”Hide
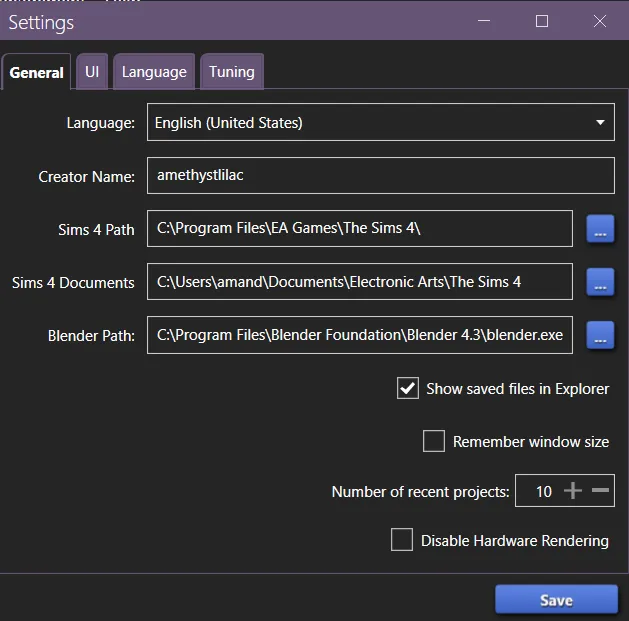
The Settings button in the menu will bring up the Settings window for S4S.
There are four tabs: General, UI, Language and Tuning. At the bottom is a Save button, which you need to use to save your settings.
The General tab has:
- a drop down menu to select the language S4S will use.
- a box that shows your creator name. You can enter it here or on the main page of S4S.
- a box for your Sims 4 Path. This is your game installation path. On Windows, this would show the folder with your
__Installer,Data,Delta, and world files, not where your .exe file is, and not the folder in your Documents folder. You can type/paste it in manually or used the...button to the right to navigate to the folder. - a box for your Sims 4 Documents folder. Typically, this would be located at
C:\Users\USERNAME\Documents\Electronic Arts\The Sims 4. It’s where your Mods folder is. You can type/paste it in manually or used the...button to the right to navigate to the folder. - a box for your Blender path. This should point to the
blender.exefor the version of Blender that you want S4S to use. Refer to the download page for S4S to see the currently supported versions of Blender. You can type/paste it in manually or used the...button to the right to navigate to the folder. - a check box for Show saved files in Explorer.
- a check box for Remember window size: if this is checked, S4S should open with the same window size it had when you last closed it.
- a selection box for Number of recent projects: This setting determines how many files S4S will remember under My Projects on the main page of S4S. You can type in a number or use the plus and minus buttons.
- a check box for Disable Hardware Rendering: This setting can be toggled if you’re having issues like jagged edges, weird lines, CC being invisible in studio, or extreme lag. You may need to experiment with it toggled on and off, and it may need to be on in some situations and off in others.
The UI tab has options to toggle on and off various confirmation messages, warnings and alerts.
The Language tab has a drop down menu to select the language S4S will use plus a check box to include changing the language used for resource type names (not changed by default).
The Tuning tab has:
- a drop down menu for choosing the TDESC version you wish to use
- check boxes for extraction options
- a button to take you to the S4S Tuning Description folder
Hide
Extract Tuning…
Section titled “Extract Tuning…”Hide
The first option in the Tools menu is Extract Tuning… If you click it, S4S will begin processing combined tuning, and when that completes, a new window will open.
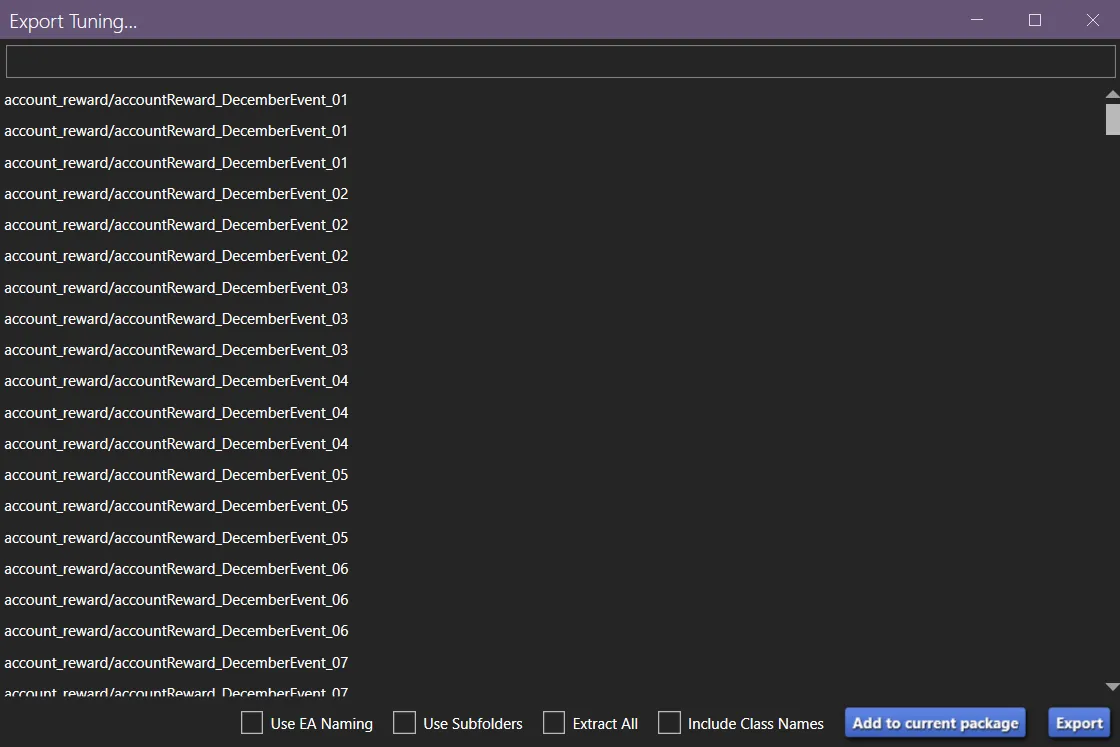
Below the title bar is an empty search bar. You can use this to find the specific tuning files you’re looking for. You may get multiple results with the same name, and there’s no way to know which one(s) you want until you extract them — grab them all, and delete any you end up with that you don’t want. Sometimes you may not get all of the ones you select, but you should get the one(s) you need.
You can select one of the files listed or multiple. When you export a file, you will also get any SimData files that are associated with that file (except in rare cases where there are multiple SimData files, but you may not run into that if you’re modding for years).
At the bottom, there are four check boxes and two buttons.
Use EA Naming: It’s probably best to leave this off unless you have a reason to want it on. Having it checked means that the file you extract will have all descriptive text removed from the file name. It will give you a file name like 0x00000000!0x00000000000686f5.0xbb0f19d8 instead of a file name using S4S naming: BB0F19D8!00000000!00000000000686F5.accountReward_DecemberEvent_02.AccountRewardTuning.xml. It only has an effect if you extract the tuning file instead of adding it to a package file.
Use Subfolders: Again, this only affects files if you extract them instead of adding them to a package. Having this on will put the extracted files in subfolders based on type. SimData will go in one folder, Account Reward Tuning will go in another, Achievement Tuning will go in another, etc. Except for SimData, this is based on the first part of the file name in the list: achievement/EP_05_PolarBearClub will get one file in a folder called Achievement Tuning, and account_reward/accountReward_DecemberEvent_02 will get one file in a folder called Account Reward Tuning and a second in a folder called SimData. Whether you have this checked is a matter of preference.
Extract All: This will extract all tuning and SimData files. This is an alternative to using the XML Extractor to extract tuning. This will take a while.
Include Class Names: This will toggle including class names in the comments (<!--posture_StandExclusive--></T> vs <!--Posture: posture_StandExclusive--></T>). It’s purely a matter of preference, but if you intend to compare a file from different patch levels, then it would be best to be consistent.
Add to current package: This will either add the selected tuning and associated SimData to the package that you had open when you opened the Extract Tuning window or offer to create a new package file if you didn’t have a package file open. It may take a while, depending on how many files you selected.
Export: This will export the tuning files and associated SimData to a location of your choosing. It may take a while, depending on how many files you selected. It will open the folder and then extract, so while it may look like it did nothing, you’ll need to wait for it to finish.
Game File Cruiser
Section titled “Game File Cruiser”Hide
If you click this option, a new window will open called Game File Cruiser. You can use this to browse through the game’s files.

At the top left is a list of file types with check boxes. Above them is a filter bar. If you type into the filter bar, it will show you only file types that contain your search term. Above that are two buttons, All and Clear. All will select all file types. Clear will clear all check boxes. To see any files, you need to check at least one box.
At the top right are more ways to search. At the top, you can filter by Group. Below that, you can filter by Instance, and to the right of that by Instance Suffix. Next you can type or paste in a Name, and the Instance field will auto fill. Last, you can filter by pack.
At the bottom right is the area where the file you’re looking at will display. There are typically two tabs, and what they contain is contextual. It may be Data and Text, or it might be Image and Data.
At the bottom left is where you select a file to look at. Before you can select a file, you need to choose one or more file type at the top, and filter the search here. You can enter something in the search bar to narrow it down, or you can click the Filter button and see everything that matches all other active filters. This is useful if you want to find something without a helpful file name, or if you want to scroll all files of a certain type. If you enter a search term, you can clear it by clicking Clear.
Once you have your list of files, you can select one by clicking on it, and it will display on the right.
String Table Lookup
Section titled “String Table Lookup”Hide
If you click this option, a new window will open called String Table Lookup. You can use this to browse through the game’s strings.
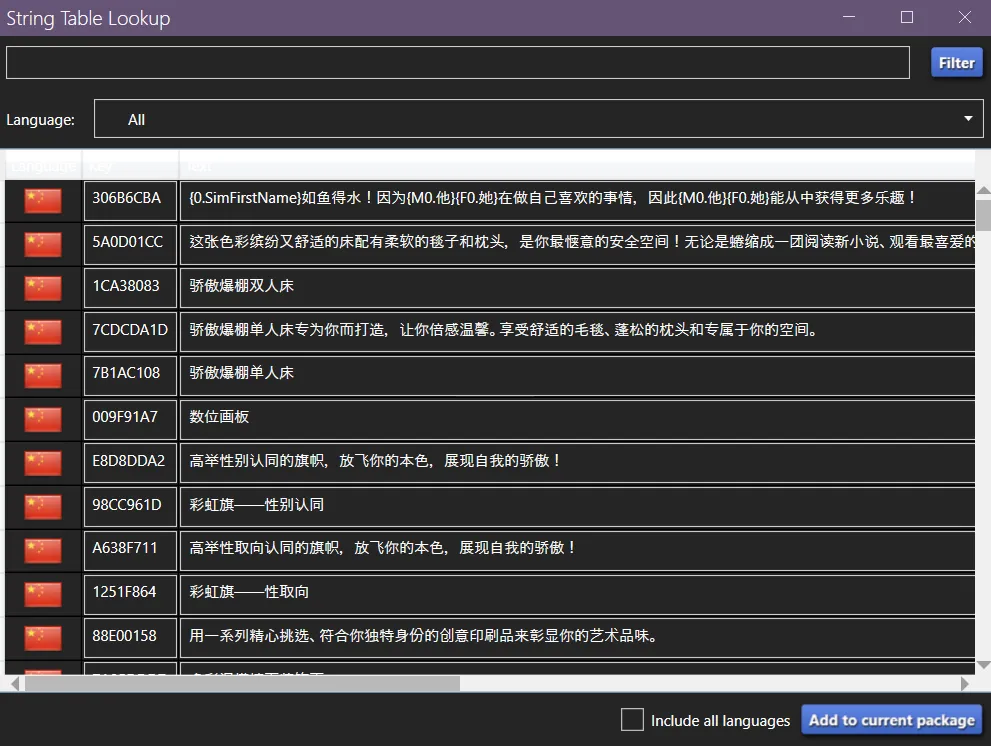
At the top, you can enter a search term and then click the Filter button at the right to see only strings that contain your search.
Then you can choose to see strings from all languages or a specific one.
Then the strings are displayed in three columns: language, key, and text.
Hash Generator
Section titled “Hash Generator”Hide
If you click this option, a new window will open called Hash Generator. You can use this to hash various things that you need hashed.
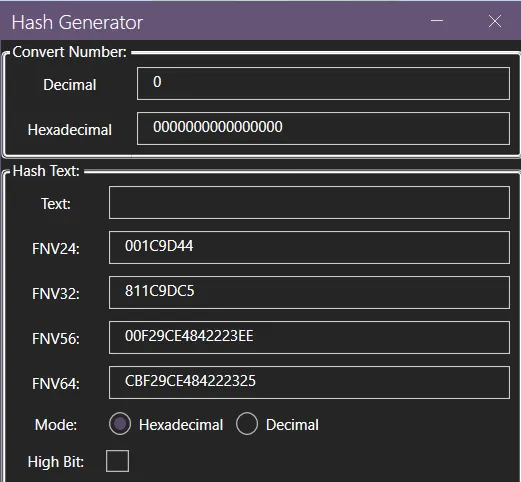
At the top, you can convert between decimal and hexadecimal numbers.
Below, you can enter text and it will be converted to various types of hashes. Under the hashes, you can select the mode. The default is hexidecimal. You can switch to decimal if you need decimal.
At the bottom is a check box to force the hashing to be high bit.
Color Palette
Section titled “Color Palette”Hide
If you click this option, a new window will open called Color Palette. You can use this to save colour palettes for custom content and to apply color palette tags and swatch thumbnails.
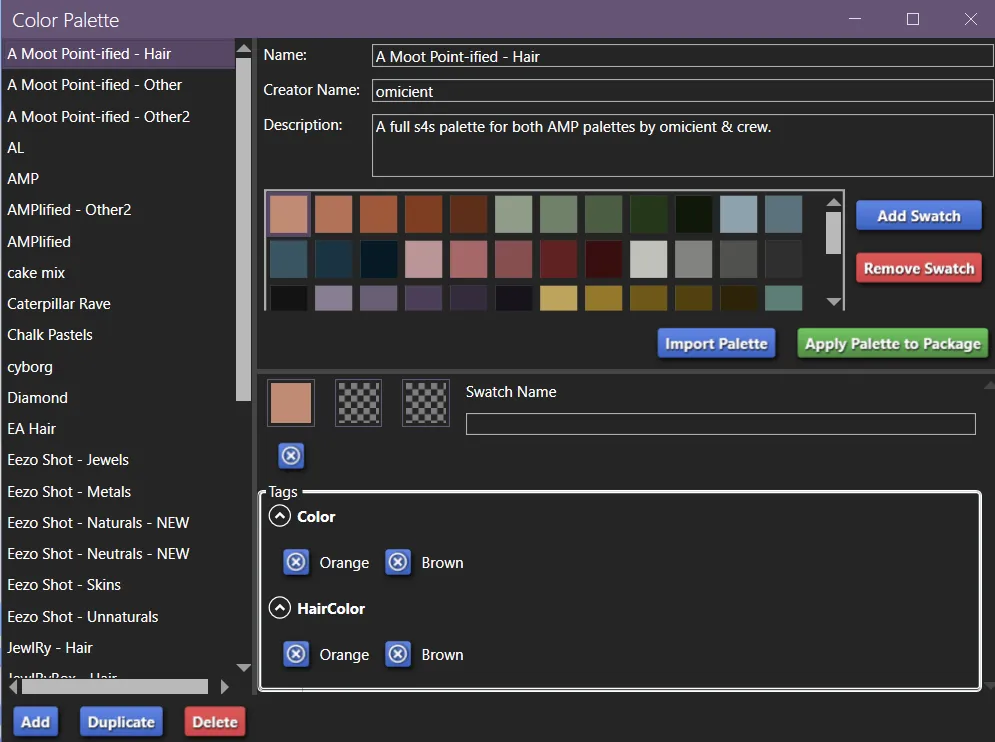
At the left, there’s a list of palettes you’ve saved yourself or that you’ve put a .s4spalette file for in your Documents > Sims 4 Studio > Palettes folder. At the bottom are buttons to Add a new empty palette; Duplicate an existing palette, which you can then edit independently of the original; and Delete a palette.
At the top right is the Name, Creator Name, and Description of the palette selected on the left, assuming they’re included.
Below that are the swatch thumbnails, with buttons to the right to Add a swatch and Remove a swatch, and below are buttons to Import a palette based on the currently open package and to Apply the currently selected palette to the currently open package. This will not recolour the custom content. It will add swatches with thumbnails that match the currently selected palette with the same colour tags. Colour tags may be regular colours, hair colours, or both.
At the bottom right is the currently selected swatch’s colour settings: the colour thumbnails that make up the swatch’s thumbnail, the colour tags, the hair colour tags, and the swatch’s name, assuming they’re included.
At the very bottom right is a button to save your edits to a palette.
Create Empty Package
Section titled “Create Empty Package”This button will create an empty package file in the location you choose with the name you specify.
Clear Thumbnail Cache
Section titled “Clear Thumbnail Cache”This button will delete the localthumbcache.package file from your Documents > Electronic Arts > The Sims 4 folder.
Modding
Section titled “Modding”Hide
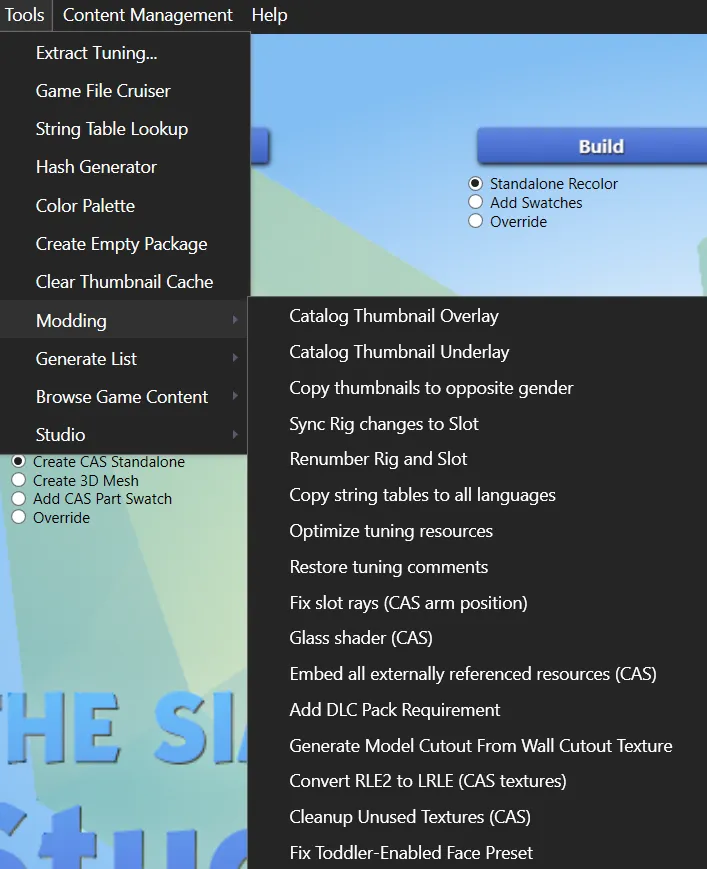
Modding is a sub menu with multiple options that are useful to creators.
Catalog Thumbnail Overlay
Section titled “Catalog Thumbnail Overlay”Use this button to add an overlay to your custom content’s existing thumbnail. This can be added to a custom thumbnail, or one automatically generated by looking at all of the swatches of the item in game. You need an existing thumbnail, or the overlay will be the thumbnail.
Catalog Thumbnail Underlay
Section titled “Catalog Thumbnail Underlay”Similar to an overlay, but appearing behind your custom content’s existing thumbnail.
Copy thumbnails to opposite gender
Section titled “Copy thumbnails to opposite gender”Does what it says: copies male thumbnails to female, or copies female thumbnails to male.
Sync Rig changes to Slot
Section titled “Sync Rig changes to Slot”Should update bones and orientations. May fix stretching in animations. May not work for all slots or for rotated slots.
Renumber Rig and Slot
Section titled “Renumber Rig and Slot”Should renumber rigs and slots so they’re sequential and not repeated.
Copy string tables to all languages
Section titled “Copy string tables to all languages”This will copy any existing strings (in game text) or string tables to any language that’s missing them. If you have missing strings/string tables for any language, the text will be blank in game. This will give those languages text.
Optimize tuning resources
Section titled “Optimize tuning resources”This will remove anything that’s not strictly necessary from tuning files and make the tuning one long line. The benefits are negligible, and it makes the tuning very difficult to read. It’s not recommended to use this and leave it that way.
It can be combined with Restore tuning comments to remove existing comments and add back default comments.
Restore tuning comments
Section titled “Restore tuning comments”This will add the default comments to your tuning, such as describing which tuning is used and telling which string matches the string’s key.
Fix slot rays (CAS arm position)
Section titled “Fix slot rays (CAS arm position)”May fix arms disappearing inside the body or clipping inside of clothes, depending on the cause. Back up your file first.
Glass shader (CAS)
Section titled “Glass shader (CAS)”Updates all meshes in all LODs of a package file to use the SimGlass shader.
Embed all externally referenced resources (CAS)
Section titled “Embed all externally referenced resources (CAS)”Adds external resources to the current package, such as meshes. If the resources are from other custom content, the original CC must be placed in your Sims 4 Studio mods folder (not your game mods folder).
Add DLC Pack Requirement
Section titled “Add DLC Pack Requirement”If you have a package that should require a pack but doesn’t, you can add that requirement here.
Generate Model Cutout From Wall Cutout Texture
Section titled “Generate Model Cutout From Wall Cutout Texture”Adds a wall cutout for windows and doors after you finish importing your wall cutout texture. This is meant for new creations — use the batch fix under Content Management for existing windows and doors.
Convert RLE2 to LRLE (CAS textures)
Section titled “Convert RLE2 to LRLE (CAS textures)”Converts images in the current package to make them compatible with colour sliders. Doesn’t add sliders to things that don’t have them.
Cleanup Unused Textures (CAS)
Section titled “Cleanup Unused Textures (CAS)”If you have unused textures in the warehouse tab of the currently open package, this will delete them for you.
Fix Toddler-Enabled Face Preset
Section titled “Fix Toddler-Enabled Face Preset”This will fix the currently open file for a preset that cause toddlers to have distorted faces. It will not fix presets that are broken in general, just ones that broke for toddlers with the For Rent patch.
Scan Folder for Resource Conflicts
Section titled “Scan Folder for Resource Conflicts”This will scan your selected folder for
Generate List
Section titled “Generate List”Hide
Generate List is a sub menu with multiple options to create lists that are useful to creators.
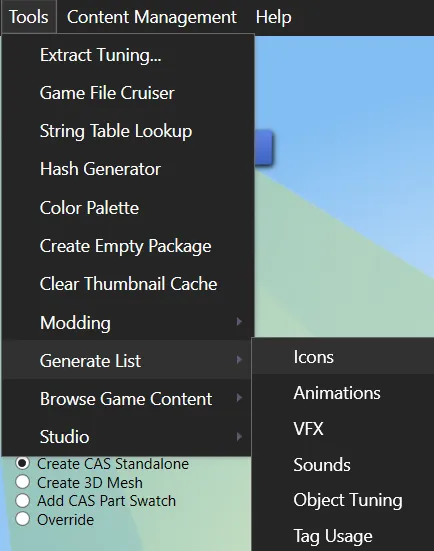
Will export a .html file to the location you choose of icons from the game, which you can then open in your internet browser to search through.
Animations
Section titled “Animations”Will open a new window with an alphabetical list of the game’s animations that you can scroll through and copy from.
Will open a new window with an alphabetical list of the game’s VFX that you can scroll through and copy from.
Sounds
Section titled “Sounds”Will open a new window with an alphabetical list of the game’s sounds that you can scroll through and copy from, with instance, name, and often the file where name and location the sound file is located.
Object Tuning
Section titled “Object Tuning”Will open a new window with a list of the game’s object tunings that you can scroll through and copy from, with the object’s internal name, Tuning ID, and tuning list for each.
Tag Usage
Section titled “Tag Usage”Will export a set of files, one per tag, that list all game items that use that particular tag, in the folder you choose. It’s advised to choose or create a dedicated folder, because there are thousands of files.
Modifiers & Sculpts
Section titled “Modifiers & Sculpts”Will export a set of .csv files, one per modifier map or sculpt map, in a folder inside the folder you choose.
Browse Game Content
Section titled “Browse Game Content”Hide
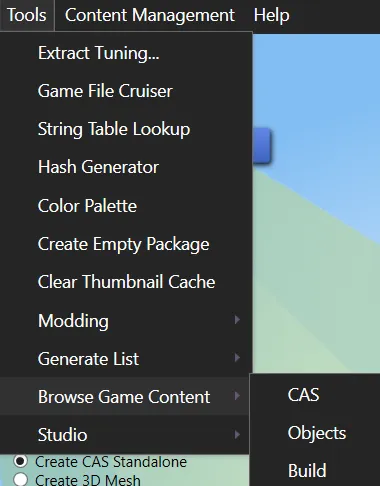
Browse Game Content is a sub menu that allows you to browse through all CAS, Build, or Buy items.
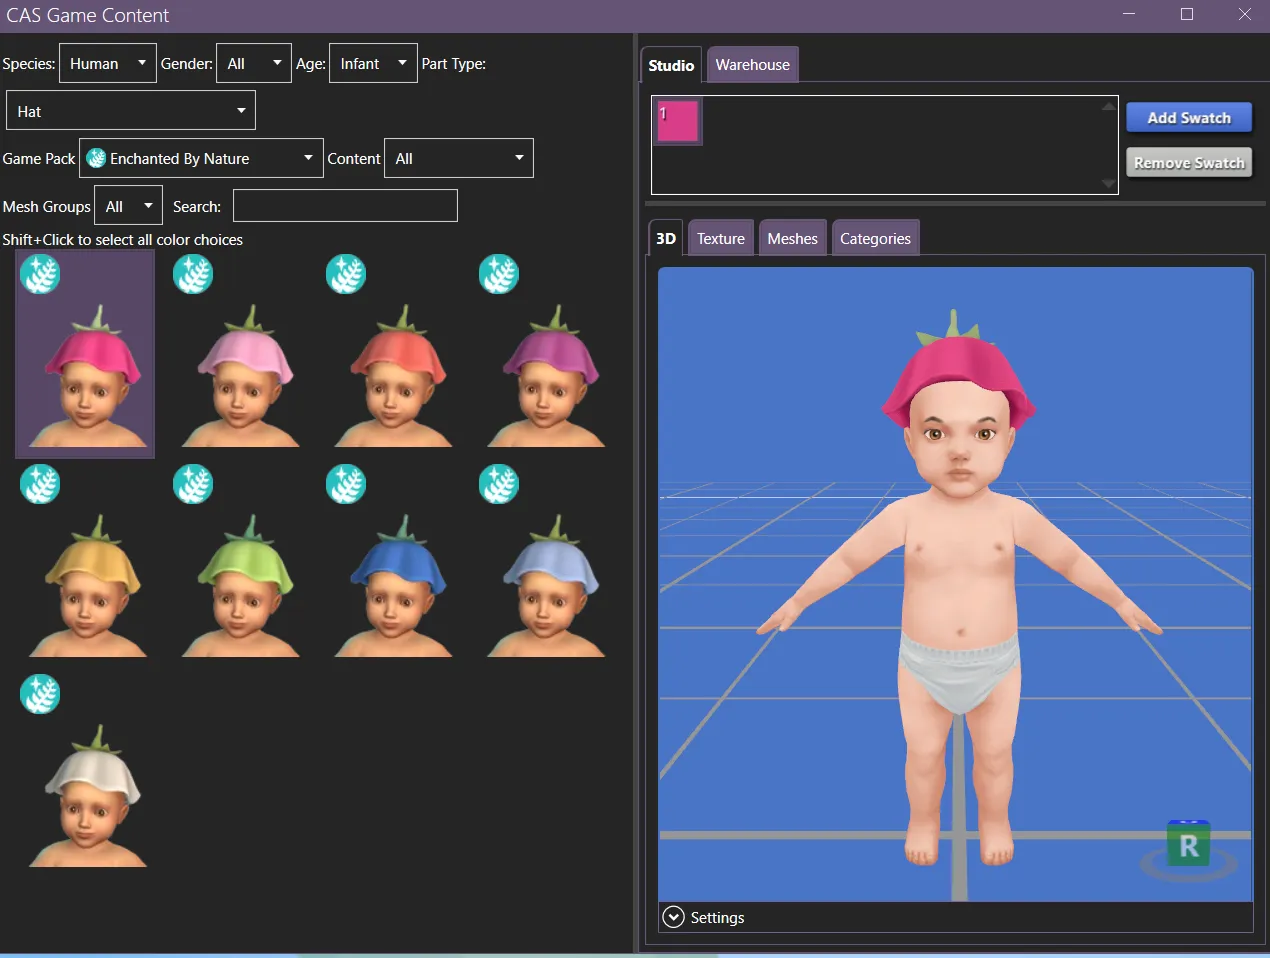
Once you pick a category, it will bring up a window that you can scroll through and filter, and show information about whichever one you select, including textures, meshes, tags, and warehouse files.
Studio
Section titled “Studio”Hide
Export All
Section titled “Export All”Exports all meshes and diffuse maps (main texture) from the currently selected custom content package into a folder in the same folder the package is in. If you plan to pair this with Import All and replace existing meshes/textures, it’s important not to rename the files.
Import All
Section titled “Import All”Imports all meshes and diffuse maps (main texture) into the currently selected custom content package from the folder they were exported in, bringing and edits you made with them. It’s important to not rename those files if you want them to replace the originals.
Content Management
Section titled “Content Management”Hide
Merge Packages
Section titled “Merge Packages”This will merge package files together into one package files. If you want to be able to unmerge it later, it’s essential that you keep the S4S Merged Package Manifest in the final package.
Un-merge Packages
Section titled “Un-merge Packages”Attempts to un-merge previously merged packages. This may fail, usually because there’s no S4S Merged Package Manifest in the package you’re trying to unmerge. This may be because the manifest was deleted, the file was made using a version of studio that didn’t create a manifest, it was never merged to start with, or it was merged using a different program.
Batch Fixes
Section titled “Batch Fixes”Please see here to read about batch fixes.
Screenshot Manager
Section titled “Screenshot Manager”Shows the .png files in your Screenshots folder, with the ability to make any of them a Memory and set an emotion, or to delete a screenshot with a red X at the top right. If you’ve made edits to the files, they should still appear but may not be valid for Memories.
My Library
Section titled “My Library”This will open a new window that shows the contents of your Tray folder. It will show the main portrait for the household/room/lot, and if you select one, it will also show the sims and their names if it’s a household.
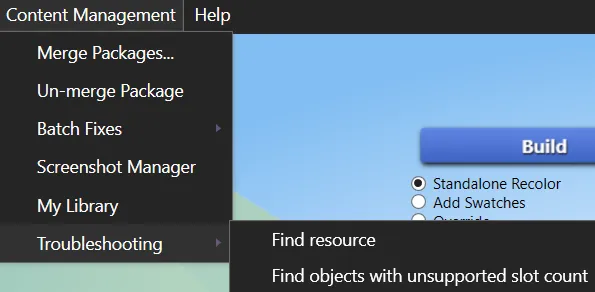
Troubleshooting
Section titled “Troubleshooting”A sub menu of Content Management, with two options:
Find Resource
Section titled “Find Resource”Enter a resource id (a decimal or hexadecimal number, such as an instance in 0xAED50CC4 form or an instanceDecimal) into the window that opens, and S4S will check if that number is in a package in your mods folder.
Find objects with unsupported slot count
Section titled “Find objects with unsupported slot count”This will search the folder you select to check for any objects with more than EA’s maximum slot count.
Hide
Information about Sims 4 Studio and the current installation. Windows only.
Forum Link
Section titled “Forum Link”Will take you to the S4S forum in your browser.
Tutorials Link
Section titled “Tutorials Link”Will take you to the tutorials section of the S4S forum in your browser.
Studio Logs
Section titled “Studio Logs”Will take you to Sims 4 Studio’s logs in its installation folder, for troubleshooting purposes.
Windows Event Logs
Section titled “Windows Event Logs”Will show a log of Windows errors related to S4S. Windows only.
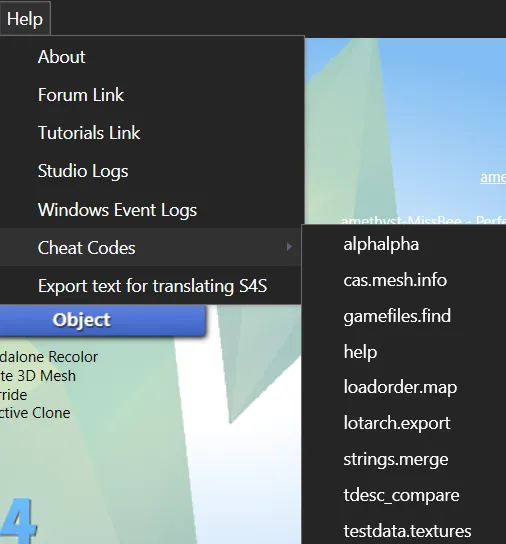
Cheat Codes
Section titled “Cheat Codes”A sub menu of the Help menu. Lists cheat codes that you can use if they’re valid in the current circumstances — in it’s a CAS custom content cheat code, a CAS package must be open, for example. Included in the list is the help cheat, which gives a list of the cheats available and what they do.
You can use these cheats by clicking them in this menu, or by opening the cheat console (ctrl + shift + C).
Export text for translating S4S
Section titled “Export text for translating S4S”Will export a .csv file of Sims 4 Studio’s text for translation.
Originally written by Amethyst Lilac for this site.