Creating an XML Compare File with WinMerge
A tutorial by Amethyst Lilac
An XML Compare file is used to compare the XML tuning from the game before and after a patch so that you can see what changed. You can use that information to find what you need to update in your mods or why things are different now than before the patch. If you want to know when something changed, this is also a good way to check, if you have extracted tuning from before the change.
To do an XML Compare, you need to have extracted tuning from the game before and after the patch in question, into separate folders. I usually have folders for each patch, sometimes multiple folders if there were hot fixes for the major patch, and one for the current patch. So as of right now, I have 1.116 Patch XMLs 1, 1.116 Patch XMLs 2, 1.116 Patch XMLs 3, 1.116 Patch XMLs 4, and Current Patch XMLs, along with folders for older patches. You could export to files with the full patch number, or any other naming scheme that you’ll remember, but you do need to keep different patches in different folders. Unless you’re very low on space, it’s not recommended to delete old extracted files, because you never know when you’ll need them.
To extract tuning, follow this tutorial or use Sims 4 Studio to extract the files.
Often, the files are extracted using the TGI + Name file naming format. That’s the standard and what is recommended if you’re using the XML Extractor. I personally prefer to use Name Only, so that’s what any images will show, but I recommend that you use what works for you. For most people, that will be TGI + Name. For one thing, it allows you to import those files directly into Sims 4 Studio when you want to.
Once you have two folders from different patch levels, you’ll also need WinMerge. It’s a free downloadable application, and it creates the XML Compare files that most modders are used to. It’s Windows only, sorry. You can do them in other programs, but that’s the one we’ll use here. I’m using version 2.16.50.0, which is the current version as of today. They should all work pretty much the same though.
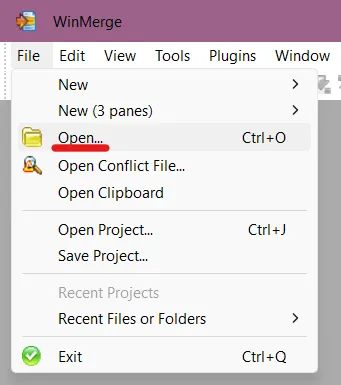
Folder Selection
Section titled “Folder Selection”The first thing to do is choose the folders where you have your extracted tuning files. In the File menu at the top left, select Open.
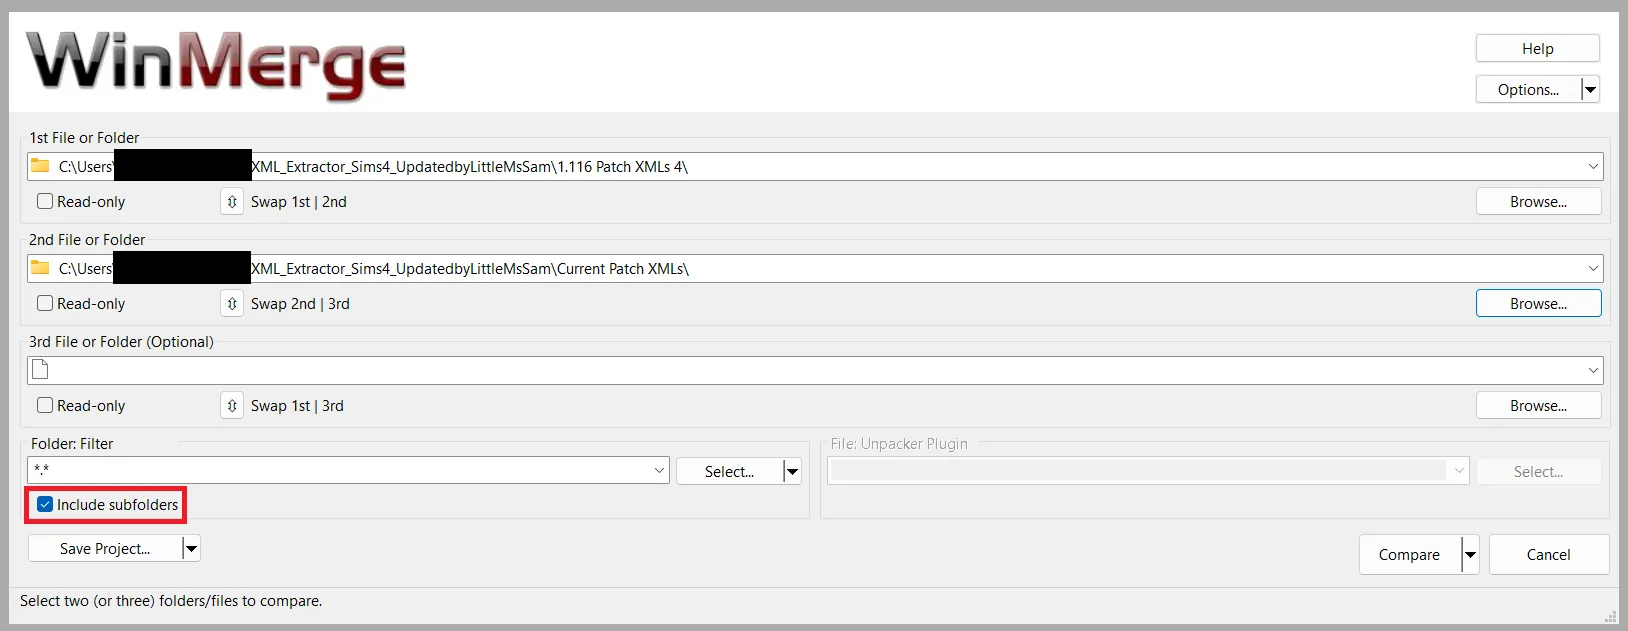
A window will open for you to select your folders. You can select two or three folders, but we only need two. You can do them in either order, but I prefer the old folder at the top and the current folder second, because then I read the differences left to right. You can also compare two specific files for their differences if you’d like.
Make sure that Include Subfolder is checked or you’ll only be comparing the folder names (BG, EP01, EP02, etc.) and you’ll find out if there’s more or less packs that have tuning but not what’s been changed.
Now we’ll set things up so that the comparison will be more helpful than the default configuration.
Open the Edit menu in the top left. Click Options. A new window will open.
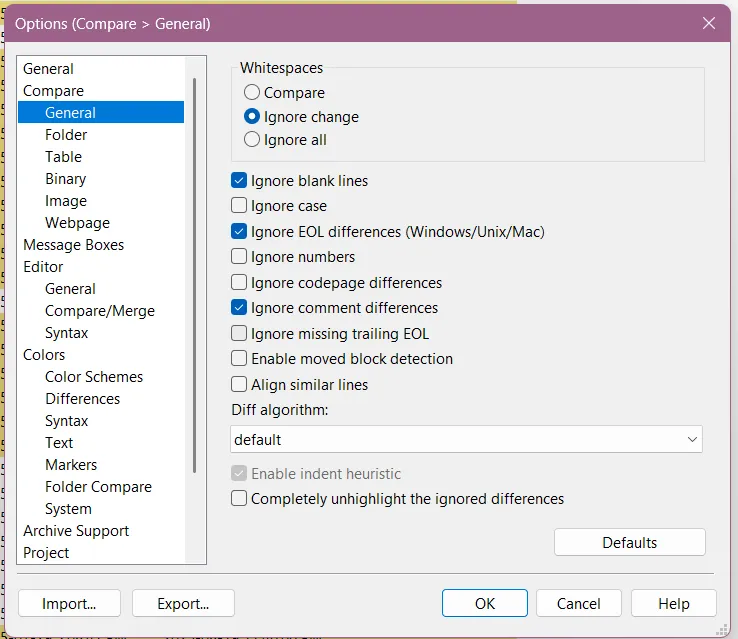
Under Compare on the left, select General.
Under Whitespaces, select Ignore change.
Check these boxes:
-
Ignore blank lines
-
Ignore EOL differences (Ignore carriage return differences if you’re on an older version of WinMerge)
-
Ignore comment differences
Sometimes EA will change the format of the comments, such as changing
<!--Cowplant_Essence_Buff_Angry-->to<!--Buff: Cowplant_Essence_Buff_Angry-->, which will give you a lot of false positives, so this is an important thing to have checked.
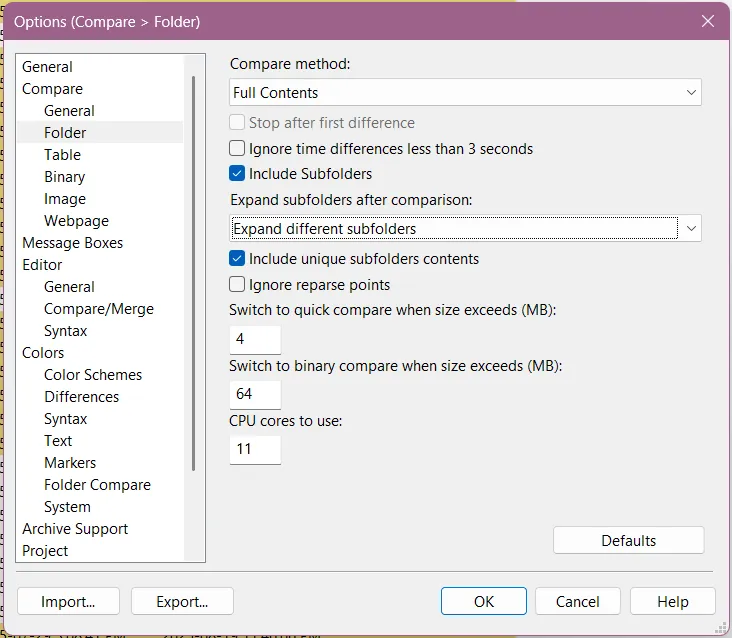
Next, click on Folder, still under Compare.
Make sure the Compare method is Full Contents and that Include Subfolders is checked.
Under Expand subfolders after comparison, choose Expand different subfolders. This is optional if you plan to look at the differences in WinMerge itself, but essential if you want to export a report.
Make sure Include unique subfolder contents is checked. This will tell you if anything has been completely removed or added.
You can also make changes to what WinMerge looks like under Colors, but I’ll leave it on the default for this tutorial. If you want to change it, I’d recommend waiting until you have the comparison open, because the changes are instant and you can decide what works best for you.
Click Okay at the bottom right.
Comparing
Section titled “Comparing”Now it’s time to generation the comparison. Click Compare at the bottom right.
WinMerge will start comparing the folders. It will take a while. Maybe go for a quick walk or grab a snack. It will ding when it’s done, and the progress bar will disappear.
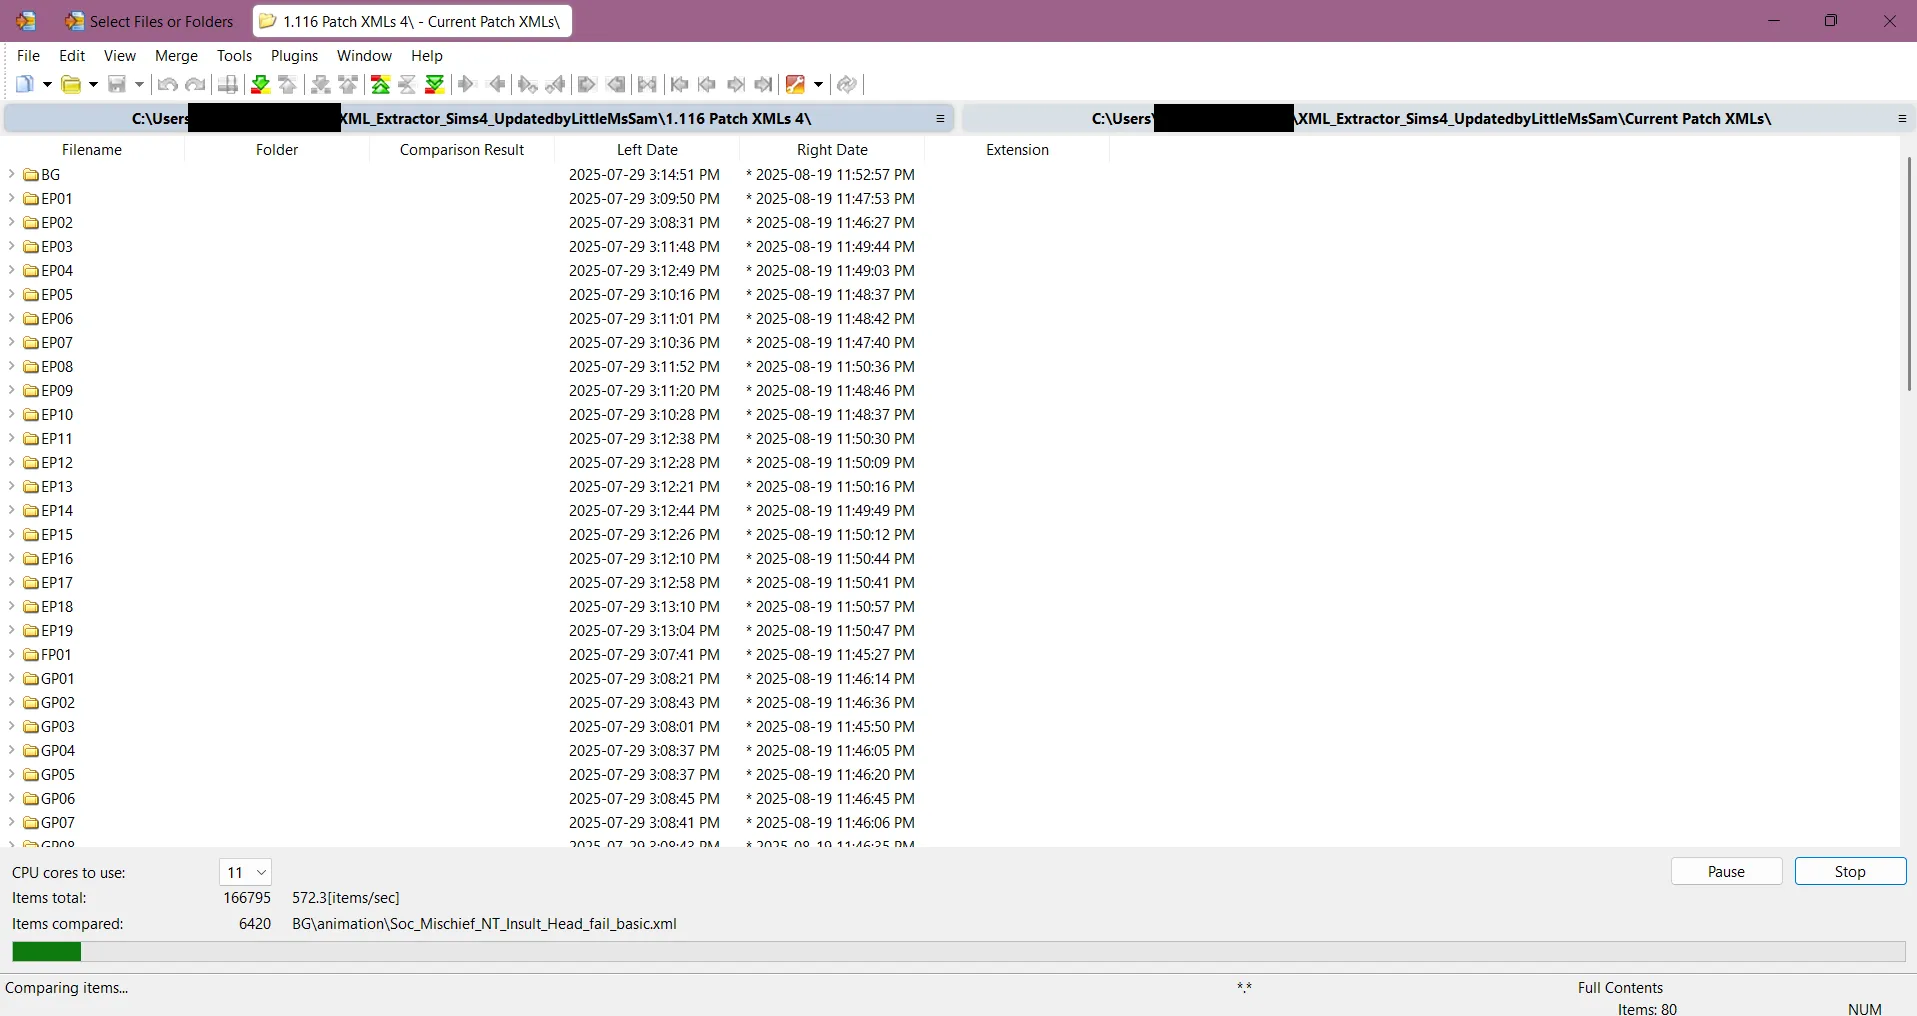
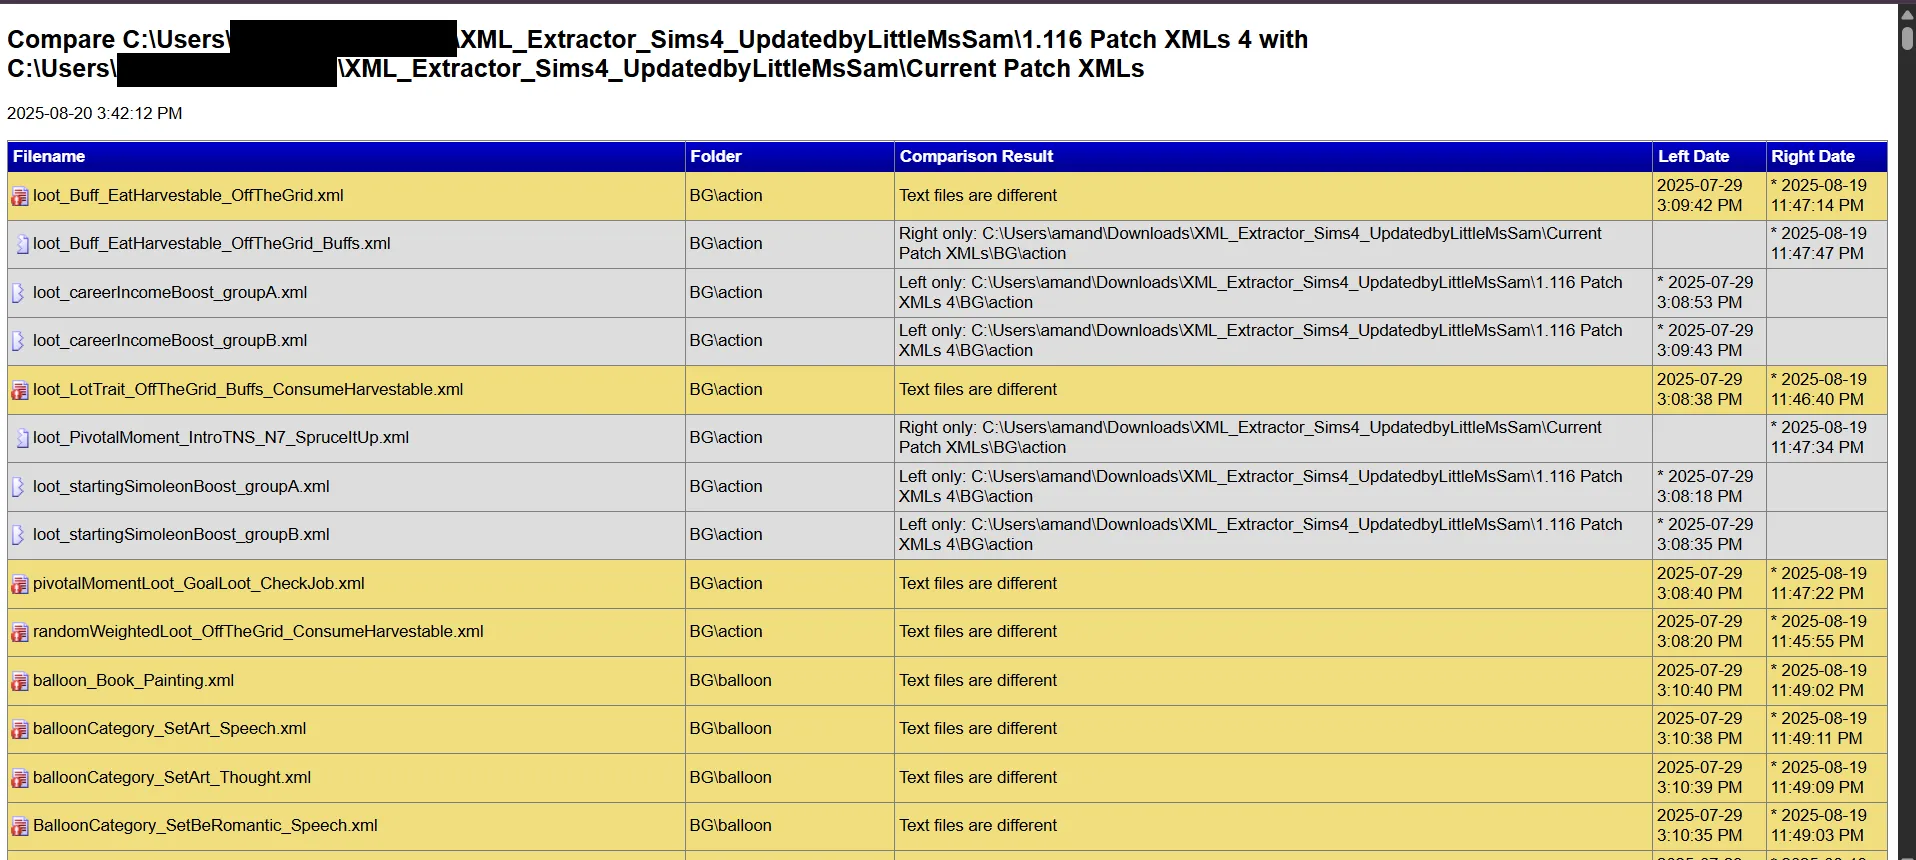
Once it’s complete, you should have something like this.
Refining the Report
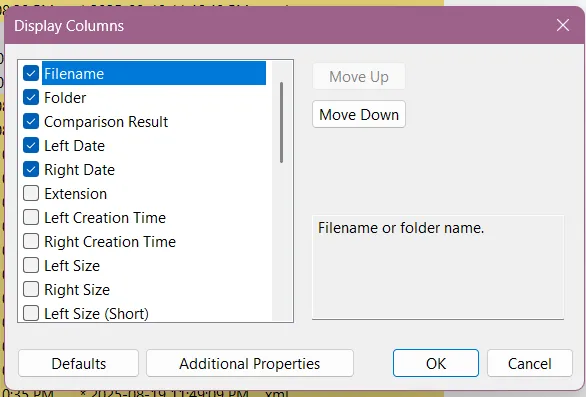
Section titled “Refining the Report”To change which columns are shown, right-click one of the column headers and click Customize Columns. A new window will open where you can select which columns are shown and their order. Check boxes to show them, uncheck to hide them. I see no reason to have Extension showing, so I hide that. You can also use the buttons to change the order of the columns.
You can also change the order of the columns by dragging them directly in the report.
Go to the View menu at the top.
Make sure Show these are checked:
- Different Items is checked, or there’s no point in doing a comparison.
- Show Left/Middle/Right Unique Items
If you want to export the report as a file:
Section titled “If you want to export the report as a file:”- Uncheck Show Identical Items.
- Uncheck Tree Mode.
Go to the Tools menu at the top. Click on Generate Report. A new window will open.
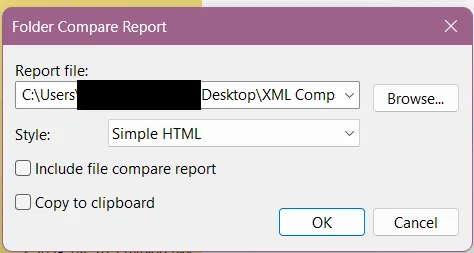
Type in your file name ending in .html — the file extension is important.
Click Browse and choose where your report will export to.
For Style, choose Simple HTML.
Click OK.
A file will be created with your chosen file name in the location you selected. When it’s complete, it will ding and there will be a pop up. Double click on it to open it in your web browser.
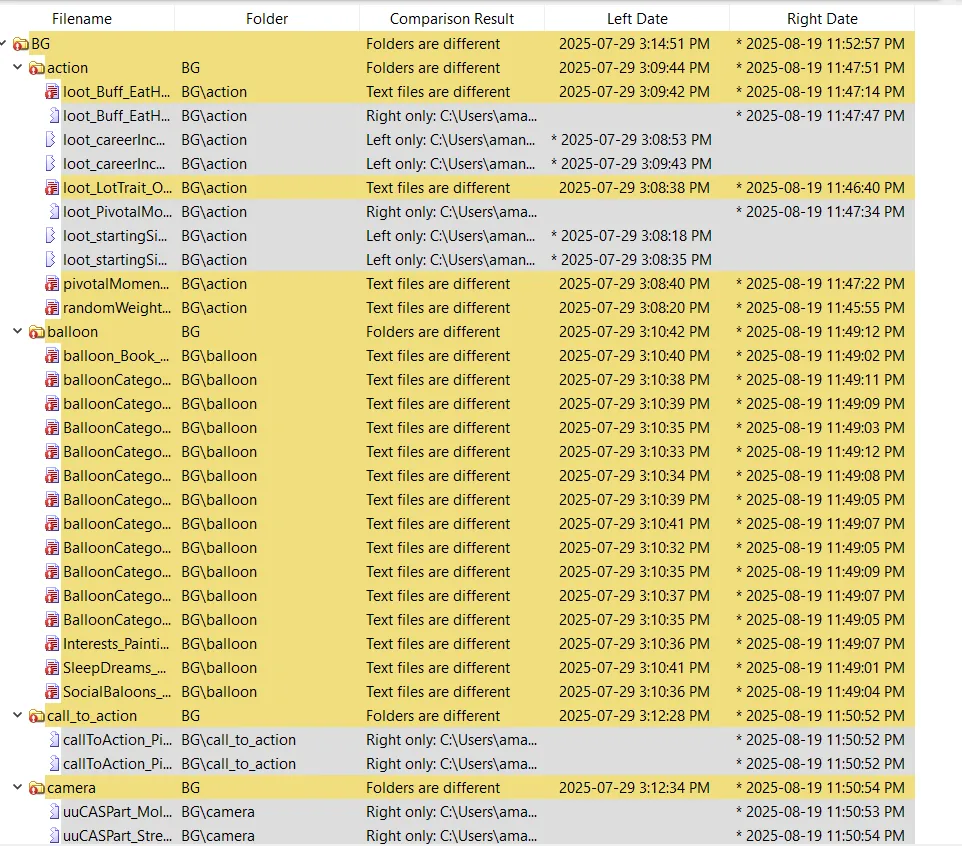
If you want to look at the comparison in WinMerge:
Section titled “If you want to look at the comparison in WinMerge:”- Show Identical Items can be checked or unchecked. You can toggle it as needed. It has different benefits if on or off — if on, you can see if everything withing a certain category has changed or only some things, but you’re also looking at every file in the game.
- Check Tree Mode. This will let you collapse folders so that you don’t need to look at everything at once.
Browse the files as you like.
Reading the report
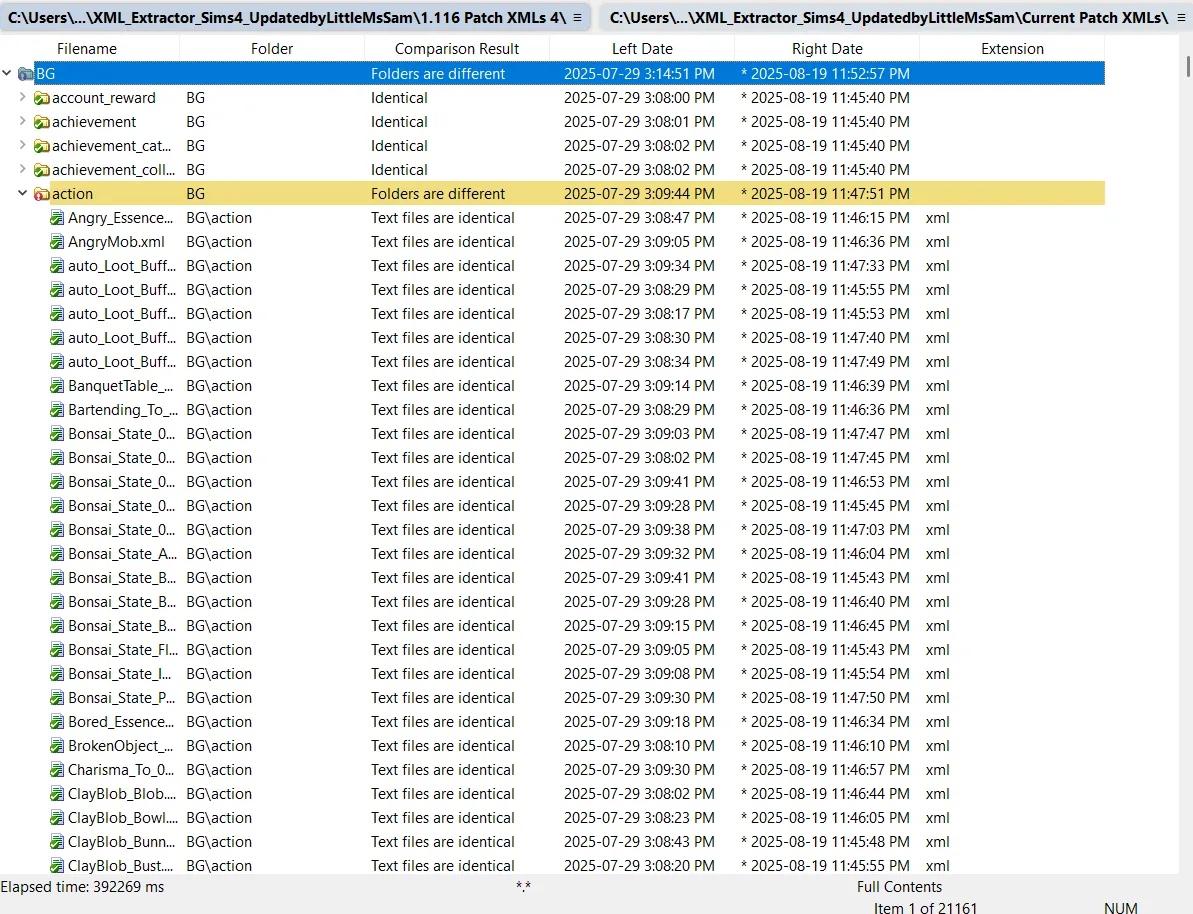
Section titled “Reading the report”Files that have changed are highlighted in yellow (on the default theme).
Files that are unique to one side (old or new), meaning files that were removed, renamed, or added, are grey.
Files that are unchanged are white.
If you exported the report, you can search using it using Ctrl + F. So if you want to know if career_AdultPartTime_Babysitter_Level1 has changed, you can search for that. You can also search for career or babysitter.
If you’re looking at the report in WinMerge, you can collapse and open folders. If you have Show Identical Items toggled on, you can see if all of a type of file has changed or just some. You can right-click the files to open them. But you can’t search.
Both methods have benefits. You can use both or one or the other.
Originally written by Amethyst Lilac for this site.