Fixing CC For New Occults
So EA decided to add a new occult (or change the tag on an old one). That’s great, except none of your CC works for the new occult.
This tutorial will tell you how to fix your CC manually so that it will show up in CAS if you don’t want to wait for a batch fix. It will not tell you how to fix mesh issues for an occult if that’s an issue.
It’s intended as a beginner level tutorial. It’s not going to show you how to make CC, but it will go over things step by step. It assumes you know how to install and open Sims 4 Studio.
You’ll need:
- Sims 4 Studio
Yeah, that’s it. No other programs.
Why Things (Probably) Need Updating, and What You Need
Section titled “Why Things (Probably) Need Updating, and What You Need”When a new occult is added, or when EA changes an existing occult so that CC no longer shows up for them, it’s almost always a matter of a new tag being needed for the occult — usually just the occult form (spellcasters are an exception to the rule). Without that tag, some CC simply won’t be available for the new occult. Some might though! It all depends how things are set up for the occult, and that’s outside our control. We can only fix what needs fixing.
Since Sims 4 Studio now shows new assets even before it’s updated for the pack, it’s much easier than it was when they changed alien tags. I had to use Morph Maker to get the new tags then.
Note that this may not work if EA changed enough that Sims 4 Studio can’t open or edit CAS items, which does occasionally happen. In that case, you’ll need to wait for an update, which may include a batch fix for the new occult or may just restore functionality. Even if there’s a batch fix, there’s no guarantee that it will work on all types of CC, so you may still need to either wait for an update of the batch fix or fix things manually.
At present, for example, there are two batch fixes to enable things for fairies, but neither works on skintones.
Finding the tag
Section titled “Finding the tag”-
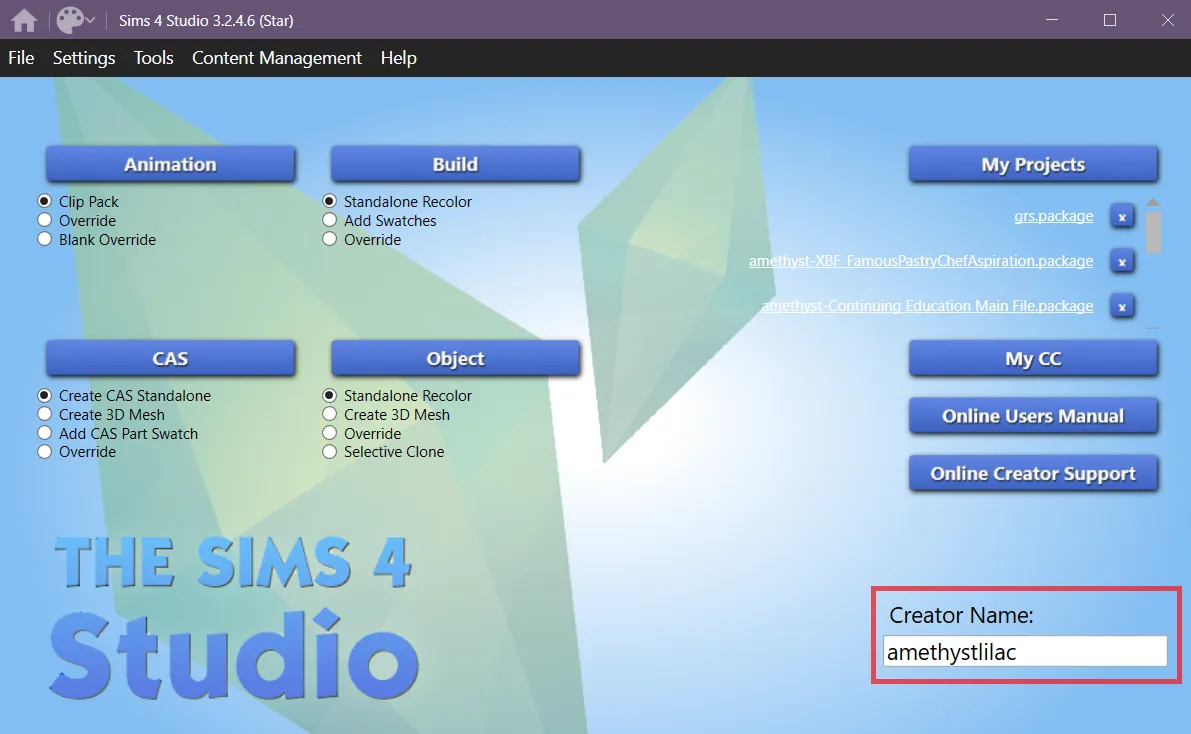
Open Sims 4 Studio and enter a creator name. This is required to create a package file, which we’re going to do. Don’t worry what it is, unless you’re planning to make mods or custom content for other people to download. You can always change it later.
-
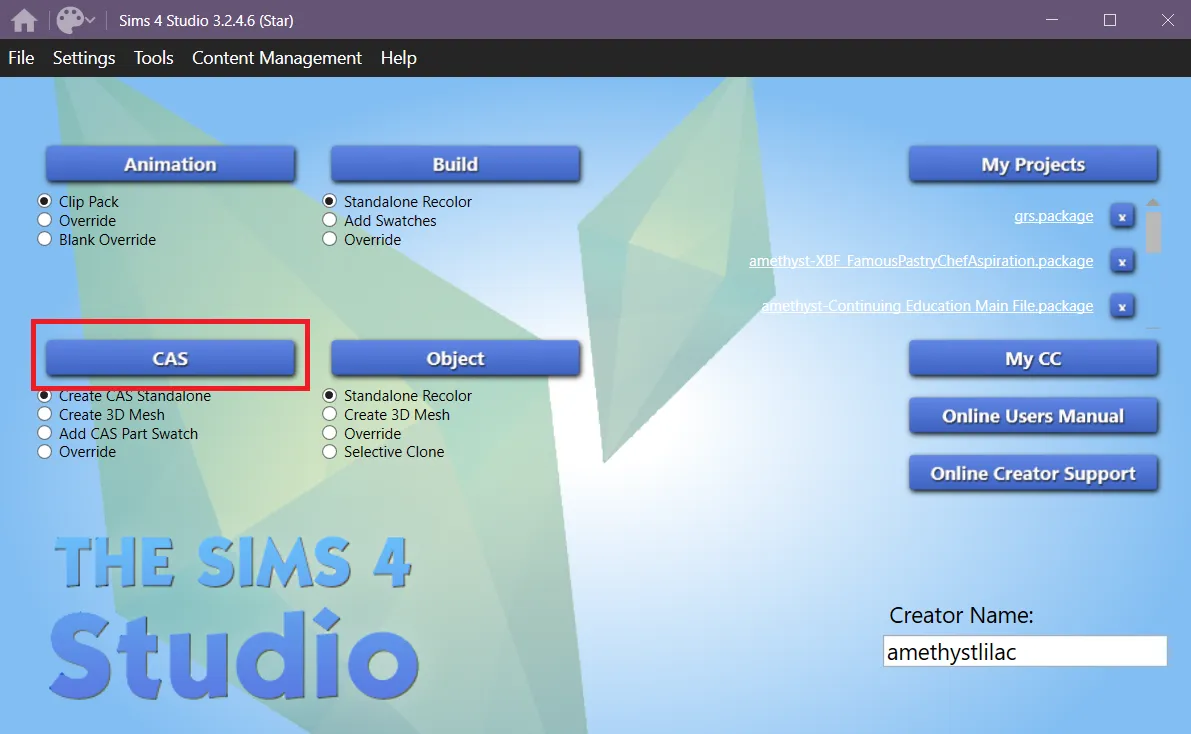
Click CAS. It doesn’t matter which of the things in the list below are selected, since we’re not actually making CC. We’re just looking.
-
If S4S hasn’t yet updated so that the new pack is available in the menu at the top, scroll all the way to the bottom. There will be some things there with no icon that indicates which pack they’re from or that they’re from base game. Select one that works for the new occult in CAS.
If S4S has already updated to show the new pack in the menu at the top, filter by that and select one that works for the new occult in CAS.
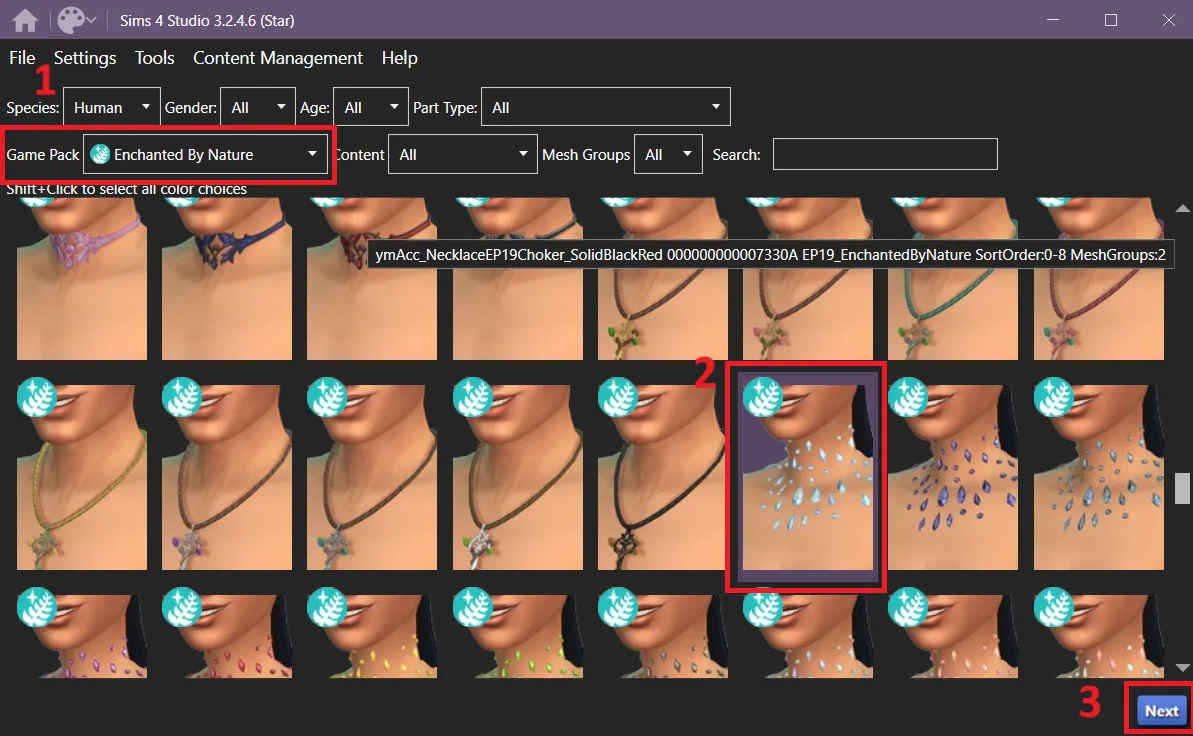
Click Next at the bottom right. A window will pop up for you to choose a location and name a file. You’ll be creating a new .package file. Choose a location where you’ll be able to find the file and name it something so that you’ll know what it is. Then click Save.
-
S4S will do a loading animation for a second or so, and then your new package file will open. If this is your first time doing anything with CC, congratulations, you just made your first piece of CC! It’s identical to something in game right now, but you put it in a file and you could recolour it if you wanted to. (But that’s a different tutorial…)
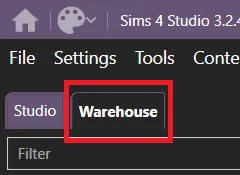
The file might open to Studio, showing you visually what the thing you selected looks like. That’s nice, but not what we need. At the top, there should be two tabs, Studio and Warehouse. Click on Warehouse.
-
For most things, there will be one CAS Part shown. If you happened to pick something that doesn’t have a CAS Part, it might be something else, like CAS Preset or Skintone. In that case, there might be more than one file, but you need CAS Preset or Skintone, so if necessary, click on that line on the left.
On the right, there’s a search box at the top. Type in tags.
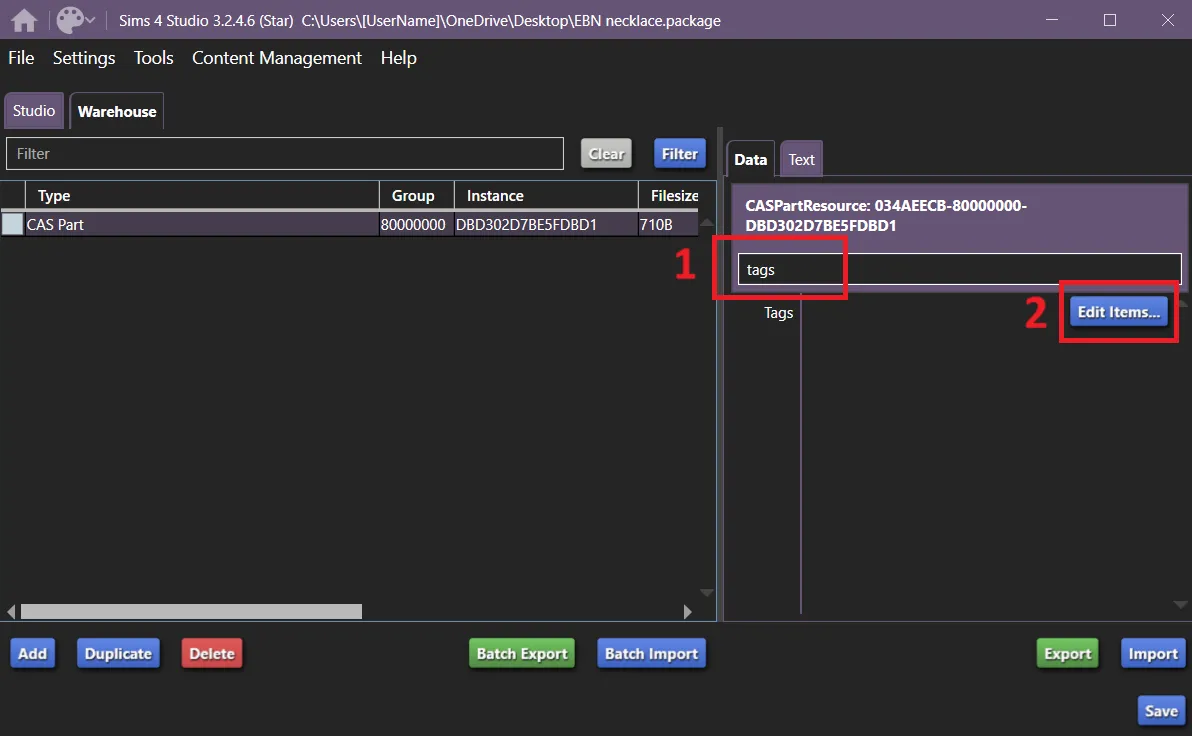
Click the
Edit Items...box. -
The Editing Tags… window will open. Here you want to find the tag for the new occult on the left. If S4S is updated, it should be obvious.
If S4S isn’t yet updated for the new occult, the list may have something like Unknown Resource or a series of letters and/or numbers. As long as there’s only one, and you’ve checked that your chosen item does show in CAS in the new occult’s occult form, then this is almost certainly the tag you want.
Once you pick it, it should have the information on the right that you’ll need. If it does NOT say Occult, then you have the wrong tag (or you’re re-purposing this tutorial to do something else, which is fine, but I can’t help you here. If you need help with that, come to Creator Musings. The link’s at the top of the page.).
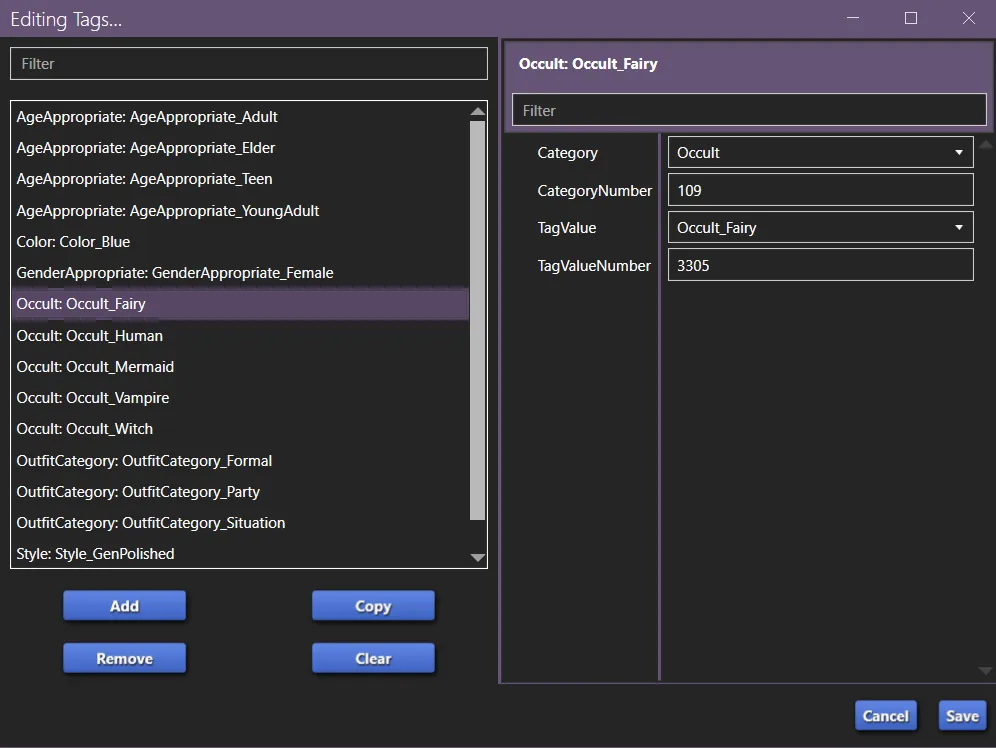
What you need to know is that the Category is Occult and the CategoryNumber is 109, and whatever the TagValueNumber is. The TagValueNumber is what tells the game which occult the tag is for, and the tag tells the game who’s allowed to use the item. Other tags tell the game different things, but we’re only concerned about the occult for now, and most of the time, you can edit tags in Studio, which is more user friendly and has an ‘apply all’ button, which Warehouse doesn’t have.
So that’s all we need from here. Make note of the numbers. You’ll need them to fix your CC. Then close both the Editing Tags… window and the window where the .package file is open and head to where you have your CC for the next step.
Adding the tag to CC
Section titled “Adding the tag to CC”We have the information we need, now we need to use that information.
It’s always a good idea to back up your file (save an un-edited copy of it somewhere else) before making changes, just in case something goes wrong.
-
The first step is to open the .package file for the CC you want to fix. Find the file.
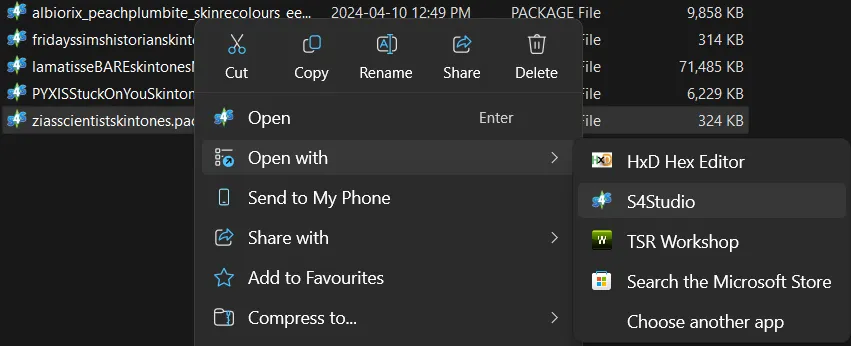
If there’s a Sims 4 Studio symbol next to your package file, you can probably just double click the file and it will open in S4S.
If there’s a different symbol, or if it opens in the wrong program, right-click the file and choose Open With. Choose S4Studio/Sims 4 Studio. You might need to click on Choose Another App or Other if S4Studio/Sims 4 Studio isn’t immediately visible.
-
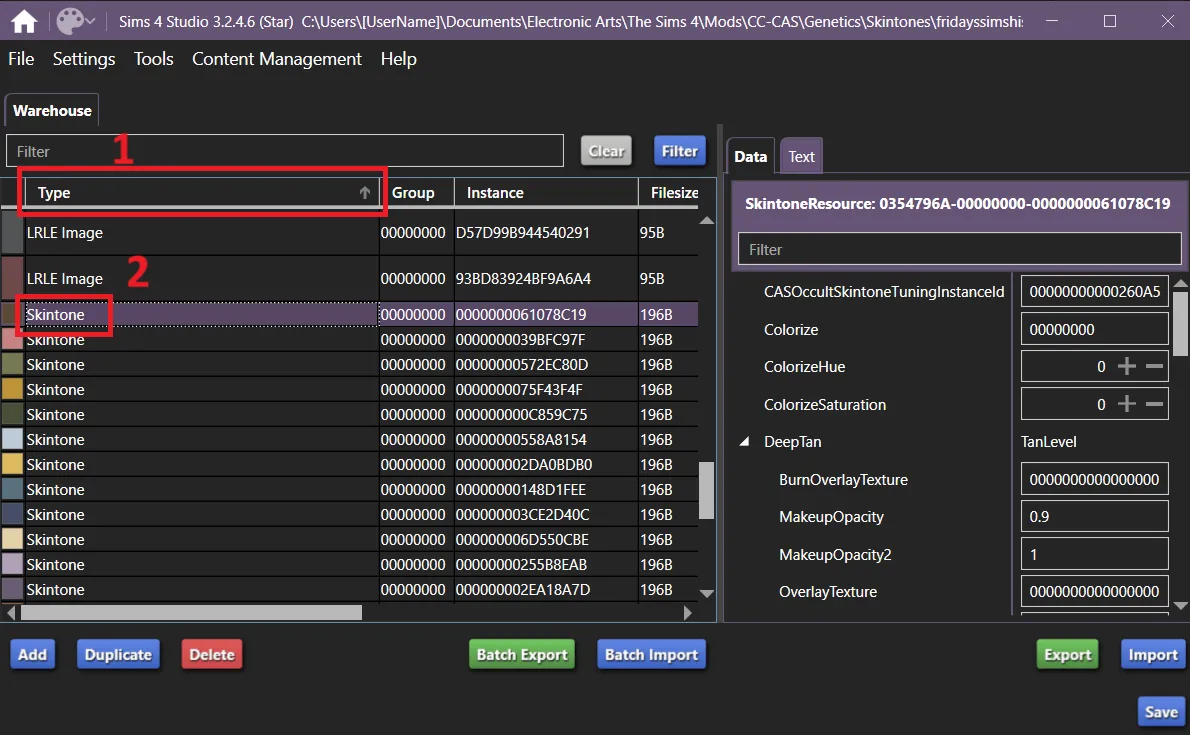
If the file is in Studio, switch to Warehouse. Not all files have a Studio tab, and that’s normal, but they should have Warehouse.
Sort by Type by clicking on the column. Select CAS Part, CAS Preset, or Skintone, depending on which type of file it is. Since you sorted by type, they should all be together in the list. If it has none of those, you may have a type of CC that I haven’t had to fix yet. If so, please let me know so that I can find the right category and add it to the list.
-
On the right, there’s a search box at the top. Type in tags.
Click the
Edit Items...box. -
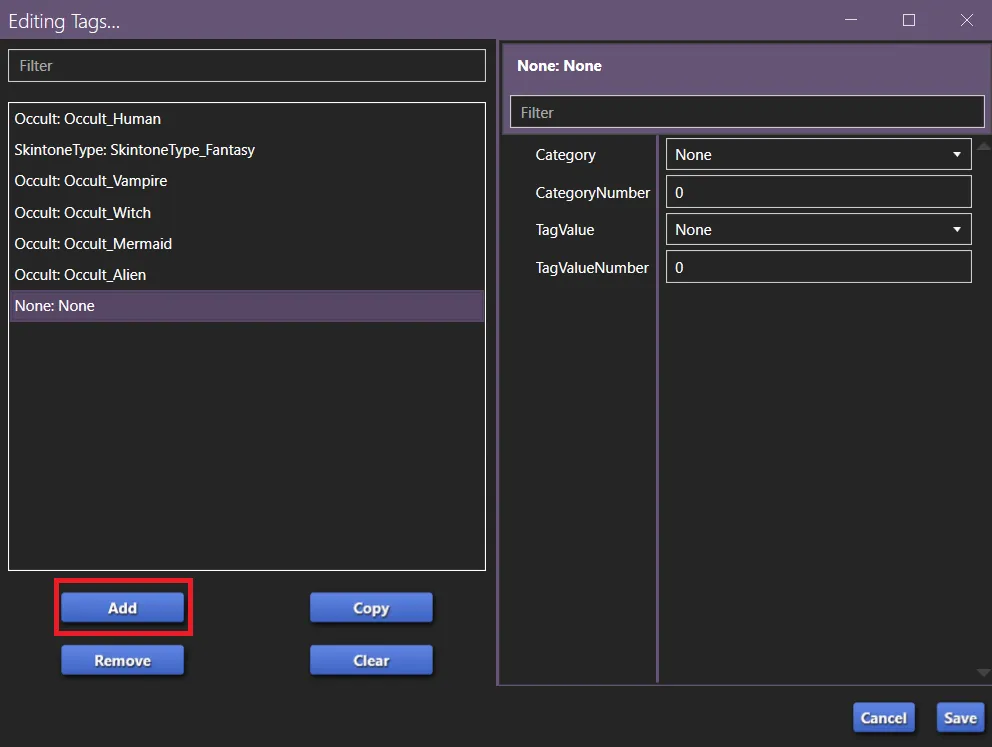
The Editing Tags… window will open. Click Add under the list on the left.
A new tag will be added to the list, None: None. This means that it’s in the category None, and it’s empty.
-
Click into either the Category box or the CategoryNumber box.
If you chose the Category box, start typing Occult. Once it auto completes to finish the word, click outside the box again. The CategoryNumber should switch to 109.
If you chose CategoryNumber, type in 109, then click outside the box. Category should switch to Occult.
At the left, the tag should change to Occult: None.
-
Click into the TagValueNumber box, and enter the number we found for the occult, then click outside the box.
If S4S isn’t yet updated for the new occult, the TagValue will stay at None.
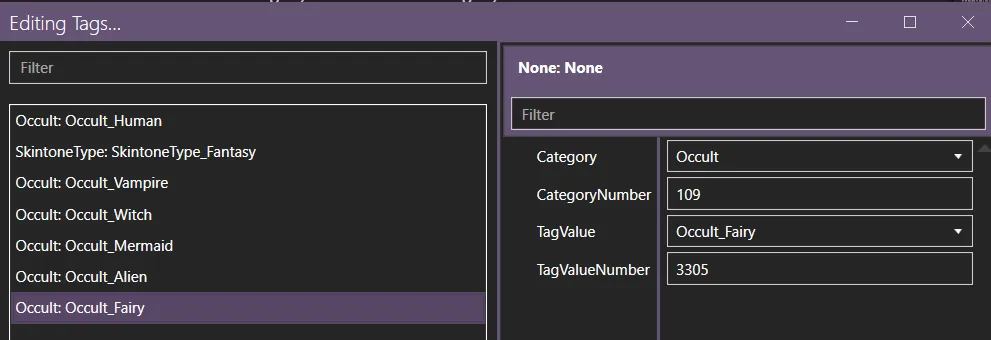
If S4S has been updated for the occult, the TagValue will switch to the new occult’s internal name. This isn’t always its name in game. Spellcasters, for example, are Witch.
At the left, the tag should change to either have the occult’s internal name (Occult: Occult_Fairy) or to have the number you entered (Occult: 3305).
-
Click Save at the bottom right. The Editing Tags… window will close.
-
The hard part: Repeat this for every CAS Part/CAS Preset/Skintone in the package. Remember to Save each time. If there are very many to update, it’s probably a good idea to save the entire package along the way too, in case it accidentally gets closed.
-
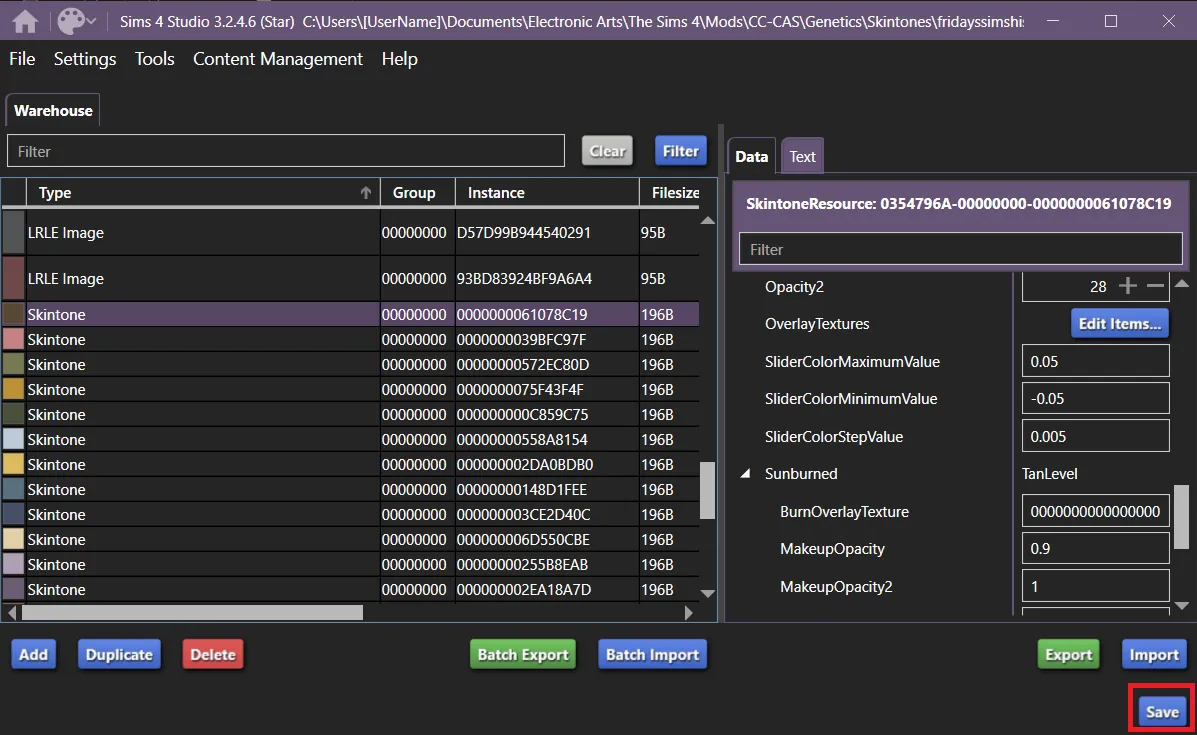
Very important: You have to save the entire package file too. This is done by clicking Save at the bottom right of the main package file, on the same screen where the Warehouse tab is.
Testing
Section titled “Testing”Assuming all went right, all that’s left is to test your file in game! Make sure to do that before you discard your original un-edited backup.
Once you’re absolutely sure it works, you can delete the backup if you want, and you can delete the file you made when you were getting the tag information.
Originally written by Amethyst Lilac.